A Step to Step Guide to Elm Signal
When I first start to learn Elm, I failed to understand Elm Signal. Luckily there is a start-app which wrap up Signal so that I don’t have to understant it to start playing with Elm. However, I like to understand how the tool I use work so I decided to spend time on it.
From the Elm documentation,
A signal is a value that changes over time
In Elm, anything that changes over time can be Signal including time itself(chill, will explain later). Common signals you’ll see are mostly from user inputs. For instance mouse position, mouse click, keyboard inputs.
This is the skeleton code we’ll use along this tutorial.
import Graphics.Element exposing (..)

main : Element
main =
    show "Signal"
This should display the word “Signal” on screen. If you don’t have an environment to run Elm, the online editor is for you. Let’s start by looking at a few basic signal provided by Elm.
Common Signals
Mouse signal
When user is moving their mouse, mouse position changes. So mouse position changes, it’s a signal !!! We can visualize it:
Mouse.position : (0,0)-----(5,15)----(230, 300)--->
where -> is time axis. Notice that the value returned by signal varies for each method. In this case Mouse.position gives us a tuple which contains position of x and y. Because signal changes overtime so if you try to add code:
import Mouse

-- skip

main : Element
main =
    show Mouse.position
you’ll get an TYPE MISMATCH error. Here is what happen
Mouse.position : ----------(0,0)-----(5,15)----(230, 300)--->
                    show
Element        : <signal>----------------------------------->
The function show is used to display type Element. If you want to display signal we have to convert all signal into type Signal Element.
Mouse.position : ----------(0,0)-----(5,15)----(230, 300)--->
                                     show
Signal Element : ----------<0,0>-----<5,15>----<230, 300>--->
where <x,y> represent value with type Element. We need a function to map both of them. Did I just say map? What a coincidence ! Elm Signal librarya also has a map function.
map : (a -> result) -> Signal a -> Signal result
Seems legit.
import Mouse

main : Signal Element
main =
    Signal.map show Mouse.position
Tada ! You’ll see a tuple showing x and y position of mouse. The values change when mouse is moving. Note that the type annotation of main function was updated from Element -> Signal Element because it’s now an Element which changes over time.
Time signal
So I did told you time itself is a signal in Elm. Let’s prove that I am not a liar.
import Time

main =
    Signal.map show (Time.every Time.second)
Time.every takes an argument - t which represent the interval and gives us a signal which representing current time. In our example, we update our time for every second. Try to substitute Time.second with Time.millisecond to see aggressive update.
See, I told you time itself changes over time so it’s a signal !
Keyboard signal
import Keyboard

main : Signal Element
main =
    Signal.map show Keyboard.presses
You’ll notice the value changes when you press your keyboard. Since the return value is Keycode we can convert it using Char.fromCode.
import Char

main : Signal Element
main =
    Signal.map show (Signal.map Char.fromCode Keyboard.presses)
This is how it looks like:
Signal Keyboard.presses : ---121-------97---------100---------48---->
                                        Char.fromCode
Signal Char             : ----y---------a-----------d---------0----->
                                            show
Signal Element          : --<'y'>-----<'a'>-------<'d'>-----<'0'>--->
First we have to transform KeyCode to it’s correspoding value using Char.fromCode. Because the KeyCode will keep updating, so we have to make sure we are transforming it into another Signal, by using another Signal.map.
Start to love Signal.map ?
Here you probably grabbed the concept of Signal and know how to display it on browser using Signal.map. Great ! Let’s look at another basic signal.
Window signal
import Window

main : Signal Element
main =
    Signal.map show (Window.dimensions)
Resize your browser to see changes.
Our examples so far only show how to work with a single signal. What if there are multiple signals at the same time? Imagine that we are displaying our time signal.
main =
    Signal.map show (Time.every Time.second)
And we want to always display it on center on window
Let’s create a view function. We can utilize container function provided by Graphics.Element library:
From the documentation:
container : Int -> Int -> Position -> Element -> Element
-- To center element exactly in a 300-by-300 square you would say:
container 300 300 middle element
We also need some function from Text library to make our font looks bigger so we will import that:
import Text

view : Float -> Element
view time =
    toString time
      |> Text.fromString
      |> Text.height 50
      |> centered
      |> container 600 600 middle

main : Signal Element
main =
    Signal.map view (Time.every Time.second)
If you are not familiar with the |> symbol, it’s just a nicer way to chain function. Without using |> our view function will be like:
view time =
    container 600 600 middle (centered (Text.height 50 (Text.fromString (toString time)))))
Yucks… So do you now start to love |> more than Signal.map ?
This should display a 50px Unix Time in a container with 600x600px on screen but as we know because we hardcoded the container width and height so it will not display on the center always.
If you remember, our Window.dimensions return a tuple which contain window width and height. Since we always want to display our text on center on window, it has to change depends on window size. So it has to be a Signal !!!
So now our view function will take 2 arguments: one is the position of window to figure out the size of its own container and another one is the value of timestamp to display.
view : (Int, Int) -> Float -> Element
view (w, h) time =
    toString time
      |> Text.fromString
      |> Text.height 50
      |> centered
      |> container w h middle
Here’s how it looks like:
Window.dimensions      : -(10,20)---------------(400,200)--------------->

Time.every Time.second : -------1-------2-------3-------4-------5------->

view                   : ------<1>-----<2>-----<3>-----<4>-----<5>------>
              (position)      (5,10)  (5,10)  (5,10) (200,100) (200,100)
We need to map 2 signals, enter Signal.map2:
map2
    :  (a -> b -> result)  -- this is our new view function
    -> Signal a            -- Window.dimensions signal
    -> Signal b            -- Time signal
    -> Signal result
main : Signal Element
main =
    Signal.map2 view Window.dimensions (Time.every Time.second)
Note that our main function type annotation is still Signal Element. We now have a pretty timer display on the center of browser. Try to resize browser and see it’s in center.
If you have more than 2 signals to map, you can always go up with Signal.map3, Signal.map4 until Signal.map5. Why the maximum 5? Seriously why don’t you ask Evan.
If you are following up, code should look like this:
import Graphics.Element exposing (..)
import Text
import Window
import Time

view : (Int, Int) -> Float -> Element
view (w, h) time =
    toString time
      |> Text.fromString
      |> Text.height (toFloat w * 0.1)
      |> centered
      |> container w h middle

main : Signal Element
main =
    Signal.map2 view Window.dimensions (Time.every Time.second)
Foldp
Oops…. something happened in the middle of an NBA game.
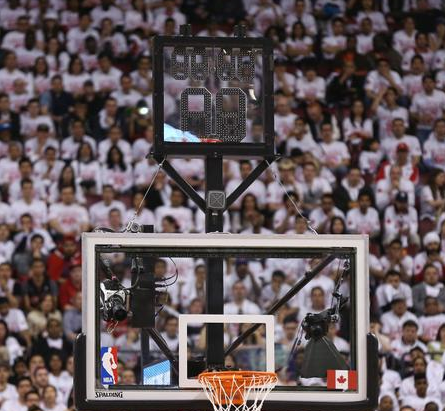
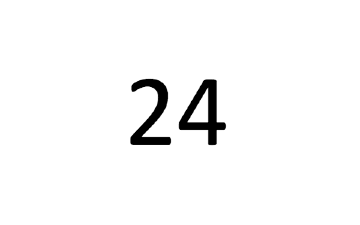
Apparently, the 24 seconds shot clock doesn’t work. Crowds are frustrating and the engineers have no idea what happened. So to be a hero for everyone, let’s us create a 24 seconds shot clock quickly. Here is what a shot clock do:
- count down every second (duh it’s a countdown timer)
- increase one second when up arrow key is pressed
- decrease one second when down arrow key is pressed
- reset to 24 seconds when space bar is pressed
So far we had display signal on browser using incoming signal and we do not bother it after that. To create a shot clock we need some place to store our current value. Or simpler where should we store the initial 24? In this case 24 is a state. It will change to 23 in the next second, then 22, 21…
Let’s see how we can store state in ELlm. Because Elm data structures are immutable and all functions are stateless, we cannot hold a state as in lanugage like JavaScript:
var a = 1; // our state
a = 2;     // change state
a;         // state changes
In Elm, to store a state, we create another signal to keep track of current value. Here is how we store the number of clicks.
Signal Mouse.clicks: --()-----()----()-----|->

Signal Int:          ---1------2-----3-----|->
We store signal by using Signal.foldp. The “p” in “foldp” means pass. In most programming language this is known as reduce function.
Definition of Signal.foldp
foldp
    :  (a -> state -> state)
    -> state
    -> Signal a
    -> Signal state
Let’s start small. We will display our 24 seconds and make it 23,22,21….
Signal.foldp takes 3 elements:
- update function - sounds like a right place to minus 1
- initial value - of course 24 !
- incoming signal - I guess our familiar
Time.every Time.second?
time : Signal Time.Time
time =
    Time.every Time.second

clock : Signal Int
clock =
  Signal.foldp update 24 time

main : Signal Element
main =
    Signal.map2 view Window.dimensions clock
Notice that you have to update type annotation of view:
view : (Int, Int) -> Int -> Element
Our update function will receive 2 arguments, value from our function time and the accumulated value which represent current state. We won’t use the first argument so we will just replace it as _:
update _ counter =
    counter - 1
Here is what it looks like
                     Time.every Time.second
Signal Time.Time: -----1-----2-----3-------|->

            clock = Signal.foldp update 24 time

Signal Int:       24---23----22----21-----|->
Oh yeah !!! It’s counting ~ But it won’t stop. Let’s change our code:
update _ counter =
    max 0 (counter - 1)
Now it stops at 0.
Action
Let’s us try implementing another feature. We want to adjust the clock by pressing up and down arrows.
Now beside the Time.Time signal, we also have to listen to the Keyboard.Signal. As we have to deal with more and more signal, our code won’t scale well. Look at our update function, it’s ignoring the first argument and only know to do one thing. Isn’t it would be great if each signal can let update knows what to do. Then update can respond according to it and do the correct thing. In Elm, we call this as Action.
We currently have one action, that is ticking the clock every second, let’s just name it Tick. Also it’s useful to have a NoOp action which do nothing.
type Action = Tick | NoOp
Remember our time function?
time =
    Time.every Time.second
Instead of returning Signal Time.Time , we want it to return a Signal Action. That’s where our old friend Signal.map comes in.
time : Signal Action
time =
    Signal.map (always Tick) (Time.every Time.second)
always is a handy function when you need to return the same value everytime a function is called. Here we return the action Tick every second.
So now our update function first argument will be an Action.
update action counter =
    case action of
        Tick -> max 0 (counter - 1)
        NoOp -> counter
So now, our signal looks like this. Now we are feeding the update function with Signal Action.
                            time
Signal Action:  -----Tick-----Tick-----Tick-------|->
                            update
Signal Int:     24----23-------22-------21--------|->
                            show
Signal Element:<24>--<23>-----<22>-----<21>-------|->
Now it seems like our update function can response to many cases. Even the users input ! We know that we’ll have 2 new type of action, that’s Increase and Decrease to adjust the time.
type Action = Tick | NoOp | Increase | Decrease

update action counter =
    case action of
        Increase -> counter + 1
        Decrease -> max 0 (counter - 1)
        Tick     -> max 0 (counter - 1)
        NoOp     -> counter
The function used by action Decrease and Tick should be the same. While for Increase, we just at 1 to the counter.
protip : always design your Elm app by first figuring out Action
Ok, so now when the up arrow key is pressed we want to tell update that it is a Increase, when the down key is pressed it’s a Decrease.
import Keyboard

--

input : Signal Action
input =
    let
        upDown = Signal.map .y Keyboard.arrows
        toAction y =
            if y == 1 then Increase
            else if y == -1 then Decrease
            else NoOp
    in
        Signal.map toAction upDown
We also explicitly say that if nothing is pressed, we will return NoOp action. So we have got everything get ready. Let’s again look at our clock function.
clock : Signal Int
clock =
  Signal.foldp update 24 time
We know that our new bro - the function input will let us know whether it’s Increase or Decrease at the right time. But how does it merge into our old bro time. We don’t want to throw away time, because it’s not loyal(ok the app won’t work). So let’s merge them !!!
actions : Signal Action
actions =
    Signal.merge time input
We call the function to merge signal actions. Notice that because the type and input are the same(Signal Action) so we won’t have to worry about having problem merging. That’s the beauty of type annotations !
We also need to update our clock function.
```elm
clock : Signal Int
clock =
  Signal.foldp update 24 actions
And if you are following up our code should now looks like this:
import Graphics.Element exposing (..)
import Text
import Window
import Time
import Keyboard

type Action = Tick | NoOp | Increase | Decrease

update action counter =
    case action of
        Increase -> counter + 1
        Decrease -> max 0 (counter - 1)
        Tick     -> max 0 (counter - 1)
        NoOp     -> counter

view : (Int, Int) -> Int -> Element
view (w, h) time =
    toString time
      |> Text.fromString
      |> Text.height (toFloat w * 0.1)
      |> centered
      |> container w h middle

input : Signal Action
input =
    let
        upDown = Signal.map .y Keyboard.arrows
        toAction y =
            if y == 1 then Increase
            else if y == -1 then Decrease
            else NoOp
    in
        Signal.map toAction upDown

time : Signal Action
time =
    Signal.map (always Tick) (Time.every Time.second)

action : Signal Action
action =
    Signal.merge time input

clock : Signal Int
clock =
  Signal.foldp update 24 action

main : Signal Element
main =
    Signal.map2 view Window.dimensions clock
Nice ! The clock is working and we can adjust it by using our arrow keys. Notice that we have to release the key again to repeat the action, either increasing or decreasing the clock. We can use Signal.sampleOn to make greater user experience. Signal.sampleOn takes 2 signal which the first signal acts as trigger to the second signal. That means if the first signal never fire, neither nor the second signal will.
In our case, we want to fire Keyboard.arrow without waiting for the release,and the Time.fps is for us :
Signal.sampleOn (Time.fps 30) Keyboard.arrows
If we update our input function:
input : Signal Action
input =
    let
        upDown = Signal.map .y Keyboard.arrows
        toAction y =
            if y == 1 then Increase
            else if y == -1 then Decrease
            else NoOp
        action = Signal.map toAction upDown
    in
        Signal.sampleOn (Time.fps 30) action
We can boost up quickly to the number we want:
But there is a feature which is still missing - when we press spacebar we want it to reset to 24 second. I’ll leave that to you by throwing a few tips:
- Start with action
Keyboard.spacelet us handle space key easilySignal.mergemerges 2 signals, if we want to merge more we have to useSignal.mergeManywhich takes a list of signal.
Signal.mergeMany [time, input, spaceBar]
Recap
Understanding Signal is probably one of the most fun thing in Elm, isn’t it? As seen above, Signal.foldp handles all state in a place, so that we can eliminate local state and write pure function. Indeed if you know Redux, it’s actually inspired by Elm. You can read more about it at the doc.
ps: Here is my final answer.